What eCommerce Teams Should Prepare Before Starting a 3D Product Visualization Project
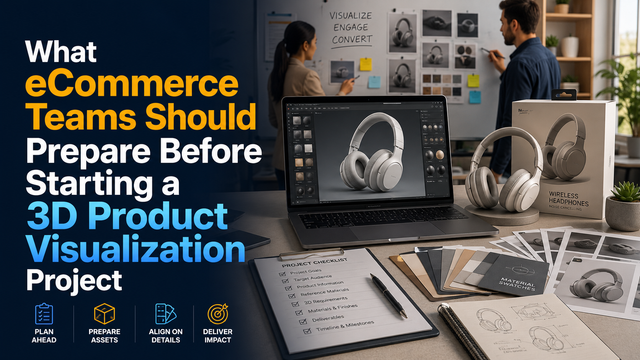
A 3D product visualization project usually becomes more efficient when the eCommerce team prepares the right information before production begins.
The quality of the final result depends on more than the visualization artist's technical ability. Accurate geometry, material references, product dimensions, required image angles, variant information, output specifications, and intended use all influence how smoothly the project develops.
For product brands, furniture companies, manufacturers, eCommerce businesses, and design agencies, good preparation can reduce unnecessary assumptions and make feedback more focused.
Working with eCommerce product visualization services can support the creation of silo images, lifestyle renders, product variants, AR-ready 3D assets, and other digital product visuals. However, the production team still needs clear product information to create accurate and reusable assets.
A well-organized brief is therefore one of the most important parts of the project.
Start With Accurate Product Geometry
The first requirement is usually accurate product geometry.
If the company already has CAD files, engineering models, or manufacturing drawings, these can provide a strong starting point.
Useful source files may include:
- STEP files
- CAD models
- Technical drawings
- Engineering files
- 2D dimensions
- Assembly drawings
- Exploded views
However, engineering models are not always ready for visualization.
They may contain hidden components, unnecessary internal geometry, or surface structures that need to be cleaned before rendering.
The visualization team may need to simplify, rebuild, or optimize parts of the file while preserving the important external shape.
If no CAD model exists, the product can sometimes be created from dimensions and reference photography.
In this situation, the more complete the measurements and images are, the easier it becomes to model the product accurately.
Provide Complete Product Dimensions
Dimensions are important even when photographs are available.
Reference images can show shape and design, but they do not always provide reliable scale.
Useful measurements may include:
- Overall width
- Overall height
- Overall depth
- Component dimensions
- Thicknesses
- Distances between parts
- Diameter
- Seat height
- Frame width
- Product weight where relevant
For furniture, dimensions may include seat depth, arm height, leg thickness, cushion dimensions, or table height.
For eyewear, frame width, lens dimensions, bridge width, and temple length may be important.
The required measurements depend on the product category.
Accurate dimensions become even more important when the 3D model may later be used for AR or interactive experiences because the model needs to represent the real product at the correct scale.
Organize Reference Photography
Product photography is extremely useful even when a CAD model is available.
Photographs can reveal details that may not be obvious in technical files.
These may include:
- Surface finishes
- Material behavior
- Stitching
- Edge details
- Product assembly
- Fabric texture
- Reflections
- Small hardware
- Manufacturing details
A useful reference set should ideally show the product from several angles.
For example:
- Front
- Rear
- Left
- Right
- Three-quarter views
- Top
- Close-up details
Images taken under clear lighting are generally more useful than heavily edited marketing photographs.
The purpose of reference photography is not necessarily to create an attractive presentation. It is to give the visualization team accurate information.
Close-up images of important product details can be particularly valuable.
Prepare Material References Carefully
Realistic product rendering depends heavily on materials.
The geometry may be accurate, but the product can still look incorrect if the surfaces are not represented properly.
Brands should provide references for materials such as:
- Wood
- Metal
- Plastic
- Fabric
- Leather
- Glass
- Rubber
- Painted finishes
- Coated surfaces
- Brushed surfaces
Useful information might include photographs, samples, manufacturer specifications, texture files, or color references.
The production team needs to understand more than the basic color.
Surface behavior also matters.
For example, two black materials may look completely different if one is matte plastic and the other is polished metal.
Similarly, timber needs appropriate grain direction and scale, while fabric may need visible texture and subtle surface variation.
Providing clear references helps the rendering team create a closer visual match.
Supply Exact Color Information Where Possible
Color can be one of the most sensitive parts of eCommerce product imagery.
A brand may offer the same product in several colors, and customers need to distinguish those variants clearly.
If available, provide standardized references such as:
- Pantone values
- RAL references
- Manufacturer color codes
- Approved digital color values
- Physical sample photography
However, eCommerce teams should remember that screen color can vary between devices.
A 3D render can be carefully prepared, but customers may still see slightly different colors depending on their monitor, phone, brightness settings, and display profile.
The objective should therefore be consistent and well-referenced digital representation rather than a claim of perfect color reproduction on every screen.
List Every Product Variant
Variant planning should happen before large quantities of imagery are produced.
The product may be available in different:
- Colors
- Fabrics
- Materials
- Frame finishes
- Sizes
- Configurations
- Accessories
- Component combinations
The eCommerce team should provide a clear list showing which variations need to be created.
This helps the visualization team determine whether the project requires simple material changes or more significant geometry changes.
For example, changing a chair from blue fabric to gray fabric may only require a material adjustment.
Changing the chair from an upholstered seat to a timber seat may require different geometry.
This distinction affects production planning.
A simple spreadsheet or structured product list can help manage large variant sets.
Decide Which Product Angles Are Required
Camera angles should be defined based on how the images will be used.
Common eCommerce views may include:
- Front view
- Rear view
- Side view
- Three-quarter view
- Top view
- Detail close-up
- Material close-up
Not every product needs the same image set.
A simple household item may only need a few views.
A complex product may require more angles to explain its design.
Brands with large catalogs can benefit from standardizing camera positions.
For example, every chair might use the same three-quarter camera angle and similar framing.
This creates consistency across category pages and helps customers compare products more easily.
If reference images from an existing catalog are available, they can help the visualization team match the desired composition.
Define Silo Image Requirements
Silo images are often the foundation of eCommerce product pages.
Before production begins, the team should clarify:
- Background color
- Shadow style
- Product orientation
- Image dimensions
- Product margin
- Cropping
- File type
- Resolution
Some marketplaces have specific image requirements.
Other brands may follow internal visual guidelines.
A consistent setup can then be applied across multiple products.
This is particularly useful when dozens or hundreds of items are being rendered.
The goal is to avoid deciding background treatment and camera framing individually for every product.
Plan Lifestyle Renders Separately
Lifestyle scenes have different requirements from silo rendering.
Instead of presenting the product against a simple background, the visualization team needs to create a suitable environment.
The eCommerce team should define:
- Intended customer
- Interior style
- Product positioning
- Location type
- Mood
- Lighting preference
- Related products
- Brand references
A furniture brand may want a contemporary residential interior.
An office furniture company may prefer a workplace environment.
A lighting brand may need a scene that clearly demonstrates the fixture's visual impact.
Reference imagery is useful here.
Mood boards, architectural photographs, existing brand campaigns, or interior design references can help communicate the intended direction.
The environment should support the product rather than overpower it.
Clarify Where the Images Will Be Used
The intended channel affects how product imagery should be produced.
Images may be required for:
- Product pages
- Category pages
- Amazon or other marketplaces
- Digital advertising
- Social media
- Printed catalogs
- Dealer portals
- Sales presentations
- Homepage banners
Each format may require different dimensions, cropping, or composition.
A square image for an eCommerce listing may need a different camera position from a wide banner image.
If the team knows these requirements before rendering, the camera setup can be planned accordingly.
This can reduce the need to recreate images later.
Consider Future AR Requirements
If the business expects to use augmented reality in the future, it is worth mentioning this at the beginning of the project.
A model prepared only for high-resolution rendering may contain too much geometry for efficient real-time use.
AR-ready models may require:
- Geometry optimization
- Reduced polygon counts
- Optimized textures
- Correct real-world scale
- Efficient materials
- Specific export formats
Common formats include glTF, GLB, and USDZ.
4dviz Studio creates AR-ready assets in these formats alongside product 3D modeling and rendering. The studio has produced more than 1,000 AR-ready eyewear models, showing how product visualization workflows can extend beyond static imagery.
Planning for future interactive use can make it easier to organize source models appropriately.
Think About Product Configurators Early
Products with many selectable options may eventually be suitable for a 3D configurator.
A configurator can allow customers to change features such as:
- Color
- Material
- Fabric
- Frame finish
- Components
- Accessories
However, configurator assets usually need to be structured carefully.
Different product parts may need to remain separate so they can be changed independently.
If a business expects this type of use, the visualization team should know before creating the final model.
4dviz Studio also provides web-based 3D product configurators, making this relevant for brands that want their 3D assets to support interactive eCommerce experiences as well as static product imagery.
Establish Naming Conventions for Large Catalogs
Large eCommerce catalogs require better organization than single-product projects.
If hundreds of assets are being created, files should follow predictable naming conventions.
A naming system might include:
- SKU
- Product name
- Variant
- Camera view
- Resolution
- Version
For example, a file name may indicate that it belongs to a specific chair model, fabric color, and three-quarter camera view.
The exact structure can vary.
The important point is that marketing teams, eCommerce managers, and visualization artists should be able to identify files quickly.
Good naming also becomes valuable when products are updated later.
Create a Clear Approval Process
Projects become inefficient when it is unclear who is responsible for approving images.
Before production begins, identify:
- Who reviews geometry
- Who approves materials
- Who confirms colors
- Who approves camera angles
- Who gives final sign-off
If multiple departments are involved, one person should ideally consolidate feedback.
This is particularly useful when product development, marketing, and eCommerce teams all have different priorities.
Without a clear approval process, the visualization team may receive conflicting instructions.
Structured feedback keeps revision cycles easier to manage.
Review Geometry Before Final Materials
A staged review process can reduce unnecessary work.
The team might approve production in the following order:
- Product geometry
- Camera positions
- Materials and colors
- Lighting
- Final rendering
Geometry should ideally be approved before extensive material development begins.
If the product shape changes after final rendering, several images may need to be recreated.
Similarly, camera angles should be confirmed before producing a full set of variants.
Low-resolution previews are often sufficient during early review stages.
High-resolution final rendering can begin once the main decisions have been approved.
Define Revision Expectations
Revisions are normal in visualization projects, but they should be managed clearly.
There is a difference between correcting inaccurate work and changing the product specification after production has started.
For example, if the visualization does not match the supplied CAD file, that is a production issue.
If the brand changes the product design after approval, that is a new project change.
Teams should communicate these differences early.
Organized revision notes can reference specific images and specific changes.
For example:
"View 03: change the frame finish from matte black to brushed aluminum."
This is easier to understand than a general request such as "update the product."
Keep Source Files Current
Product information can change during development.
New CAD files may be issued. Materials may change. Dimensions may be updated. A product variant may be discontinued.
The visualization team needs to know which information is current.
If outdated files remain mixed with approved files, there is a risk that the wrong version will be used.
A clear folder structure can separate:
- Current files
- Previous versions
- Approved materials
- References
- Final outputs
This becomes particularly important for brands with frequent product launches.
Version control helps ensure that digital imagery stays aligned with the actual product.
Consider White-Label Production for Agency Workflows
Design and marketing agencies may manage product visualization on behalf of their clients.
In these cases, external production can be used behind the scenes.
4dviz Studio provides white-label production for agencies and studios in addition to direct product visualization work.
A white-label workflow can be useful when an agency needs support with:
- Product modeling
- Silo rendering
- Lifestyle scenes
- Variant production
- AR-ready assets
The agency can continue to manage strategy, creative direction, and client communication while the external visualization team handles defined production tasks.
Clear brand guidelines and reference material are particularly important in this type of arrangement.
Prepare a Practical Project Brief
A good product visualization brief does not need to be complicated.
It should simply provide enough information for the production team to understand the product and the required outputs.
A useful brief may include:
- Product name and SKU
- CAD files
- Dimensions
- Reference photos
- Material references
- Color information
- Variant list
- Required camera angles
- Background requirements
- Lifestyle references
- Output sizes
- Intended channels
- AR or configurator requirements
- Deadline
- Approval contact
For larger projects, this information may be organized in a spreadsheet or project management system.
The goal is clarity.
Better Preparation Creates More Reusable Assets
The value of a 3D product visualization project often extends beyond the first set of images.
A well-prepared digital product model can potentially support silo renders, lifestyle scenes, additional variants, marketing campaigns, AR experiences, or interactive product configurators.
That makes the preparation stage particularly important.
Accurate geometry, clear material references, standardized camera angles, organized variants, defined output requirements, and structured feedback all contribute to a more useful asset library.
For eCommerce teams, the objective should not be simply to commission attractive product images.
It should be to create accurate, consistent, and reusable visual assets that support the wider digital product experience.
When the right information is prepared before production begins, the visualization team can spend less time resolving basic uncertainties and more time creating assets that match the brand's actual product and channel requirements.
